
Earlier this week, I headed out to Ikea...I don't even remember why I had to go there and had no plans to re-decorate, but I somehow ended up coming home with approx. 4 yards of fabric, 2 pillow covers, 2 new pillows and big plans to lighten up our family room and threw in the kitchen curtains for good measure - it happens....right, please tell me I'm right!?!?
Today, I'm going to share how I did my pillows. The tutorial I used for the striped pillow comes from Curbly. Envelope pillows have got to be the easiest pillowcases to make....it honestly took no more than 15 minutes to make one. Check out the tutorial, I found it very easy to follow.
The pillow with the number "1" on it, is my take on the Pottery Barn pillows. I made another one with "2" on it...I think that they look cute and it really wasn't hard to do.
Here's what you'll need:
pillowcase (make your own or buy one - that's what I did!)
fabric paint
paint brush (I used a sponge)
stencil
iron
Step 1:
Remove pillow form and position your stencil on the pillowcase and make sure it is secure. I used my Cricket to cut some vinyl which I stuck to the pillow and taped about the edges just to make sure it would stick.

Paint. Follow the directions of the paint you are using for proper application and drying time. ( I let mine sit over night)***Also, make sure you put something (cardboard, old towel, etc) between the pillowcase, you don't want the paint to get on the other side of the pillowcase.

Step 3:
Once paint is dry, turn pillow inside out and iron the painted area.
Step 4:
Turn inside out again, insert pillow form. Now, sit down, relax and enjoy your new pillows:)

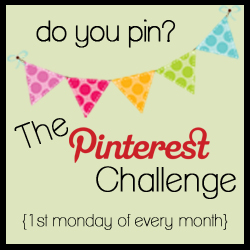
I'll be linking my pillows up to these fun parties and also submitting it to the Pinterest Challenge!
Not Just a Housewife - Show Me What Ya' Got
Seven Alive - Link it Up Thursday
Serenity Now - Weekend Bloggy Reading
Finding Fabulous - Frugalicious Friday
Ginger Snap Crafts - {wow me} wednesday
A Little Knick Knack - EBTKS Link
A bowl full of lemons - Tuesday Link Party
Simple Home Life - Features and Simply Creations Link Party
Bacon Time in Northern Cali - Anything Goes Linky
The Shabby Nest - Frugal Friday
Delightful Order - Delightfully Inspiring Thursday
House of Hepworths - Hookin' up with HoH
Tatertots and Jello - Weekend Wrap Up
I Heart Nap Time - Sundae Scoop Link Party
Classy Clutter - Saturday Spotlight
The 36th Avenue - Show me Extradordinary Link Party
Reasons to Skip the Housework Link Party
Very cute! I love PB knock-offs!
ReplyDeleteThese are adorable! I am awarding you the Liebster Blog Award! Here is the link for more details!
ReplyDeletehttp://jill-createcraftlove.blogspot.com/2012/03/liebster-blog-award.html
Jill @ Create.Craft.Love.